Veem makes it easy to create and send customized invoices. To create and send an invoice with Veem; please see the video or follow the steps below:
Step 1: Log in to your Veem account.
Step 2: Select the "Get Paid" button from the left of the Dashboard. Then, select the second tab, "Create Invoice."
Step 3: Enter the recipient’s email address. Their contact information will populate automatically if they already have a Veem account.
If the recipient does not have a Veem account, add their primary email and country.
Additionally, if you have your customer's business, contact, and banking information, you can create a contact (add a new contact). This can help streamline your payments and make processing faster for both sides.

Step 4: After entering the recipient’s email address (and details), on the next page, the first thing you'll do is choose the invoice currency

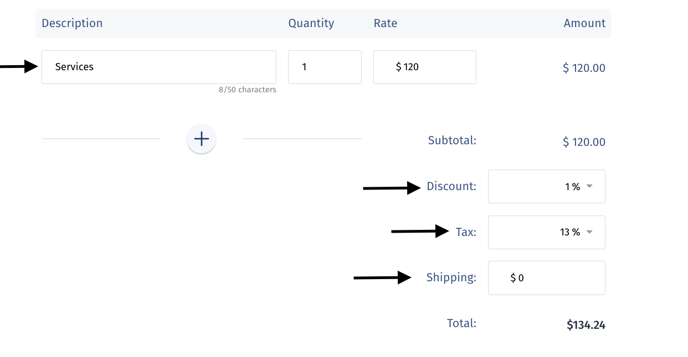
Step 5: Now it’s time to add the items. Enter a description of the item, the quantity of the items being purchased, and the price of a single item.
- Add additional items by clicking the "Add Line Item" ("+" icon) button.
- Once all of your items have been added, you can add discounts, tax, and shipping. You can also upload your custom business logo to personalize your invoice.
Step 6: After you've created your line item invoice, you will enter the following information:
- Schedule or due date of the invoice (optional)
- The purpose of payment
- The payment description
- The Invoice number (optional)
- You can also choose to schedule this invoice as recurring. To learn how to do this, click here.

Step 6: Click "Next" to add additional details such as:
- Notes to payer (optional)
- Terms of the invoice (optional)
- CC other on the invoice details (optional)
- Set invoice reminders
Step 7: Once that's complete, select the "Review" button.
Step 8: Review the details on the next page, and feel free to make any necessary changes. Once the review is complete, please click the "Send Invoice" button.
Note: Using the invoice builder option will create an invoice document and attach it to the request for you and your payer to download if needed.

Note: For new users, an email and country will be required for the sender to create a payment request and/or invoice.
If you still need help creating or sending invoices with Veem, our Customer Success team is happy to assist you.