How to activate the Veem Wallet
This article will guide clients through the steps of activating the Veem Wallet on their accounts.
The Veem Wallet is available in almost all countries serviced by Veem except Brazil and Russia. The Wallet activation will only be available to clients that have been verified within the Veem network.
To enable the Wallet:
Step 1: Please Log in to your Veem account.
Step 2: Once logged in, please navigate to Settings, then the Get Paid tab.
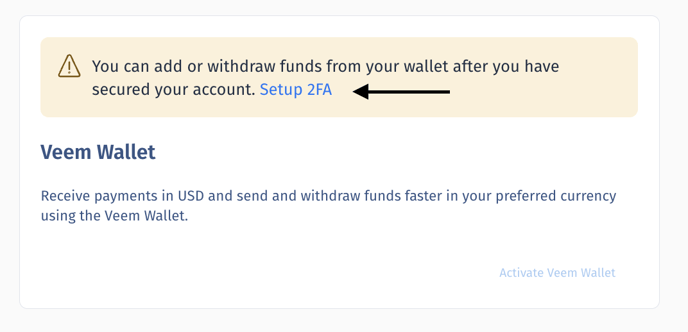
Step 3: Locate the Veem wallet card, and click set up 2FA (Two-factor authentication) as this is a security requirement needed to be able to use the Veem wallet.

Step 4: Follow the steps to complete setting up the 2FA on your Veem account. For more information on how you can complete this step, click here.
Step 5: Once the 2FA has been fully set up, navigate back to Settings, then the Get Paid tab.
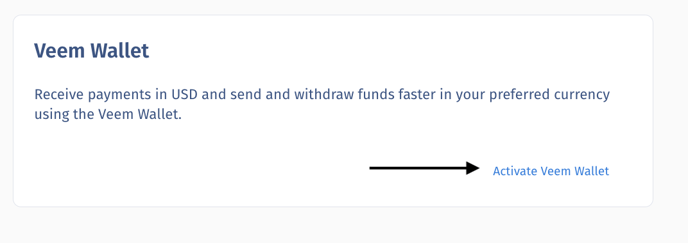
Step 6: On the Veem Wallet information card, click on "Activate Veem Wallet".

That's it! The Veem wallet is now enabled and added as an alternative funding method.
Once accessible, clients can set the wallet as the default receiving account. This will ensure that all transfers to their Veem account in USD will be deposited directly to the Wallet. All transfers made in the local currency will continue to be deposited in the bank account linked to the Veem account.
To receive payments into the Veem Wallet, please see this article.
To learn how to withdraw funds from your wallet to your bank account, see this article.
Still, need help? You can chat or call our Customer Success team here.