Before you can add approvals to your account, you'll need to add users (payment creators). For help adding users, see the help article on how to add a user to your account.
Check this video for the steps, or follow the below step-by-step instructions:
Go to your account settings and open the Approvals tab in your settings.
At the top of the approvals screen, you'll see the users on your account who can approve transactions. Again, only users with payment creator permissions will show up here.

Next, you can start adding your payment tiers. Tiers are determined by 2 primary details;
- The payment size.
- The number of approvers for these transactions.
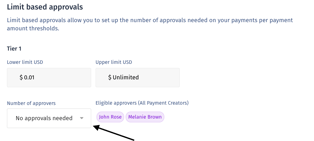
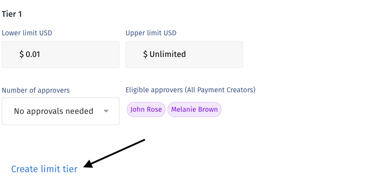
The first tier will already appear on your account. To add an approver for this tier, click the drop-down menu under Number of Approvers and select the number of approvers you want.
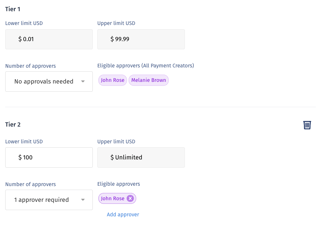
To create a new tier, click on "Create Limit Tier." A new tier will appear, and you can add a Lower Limit where you'd like the tier to begin and assign the number of approvers you want for that tier.
This will automatically adjust the previous tier and set the Upper Limit. The maximum of your previous tier will adjust to being exactly $0.01 less than your minimum on the new tier.
You can set as many approvals as you want for whatever limits you decide.
Your approvals for your Veem account are now set! You can also use the Department Approval structure.
For help on how to approve transactions, see the help article on how to approve a payment.
Still need help? You can chat or call our Customer Success team here.