Please follow the steps below to create an individual account.
Step 1: To get started, click "Sign Up" on the home page Veem.com, or click here.
You can create your Veem account by signing in with either Intuit or Google, OR you can sign up with your email. 
Note: If you don't use Intuit or Google to create your account, you'll be prompted to create and confirm a password for your Veem account.
Step 2: You'll be directed to set up 2FA for added security. You can skip this step and set it up later if you prefer.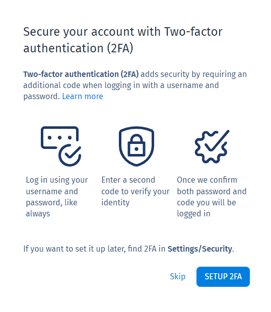
Step 3: Select "Individual" as the type of account you want to create.
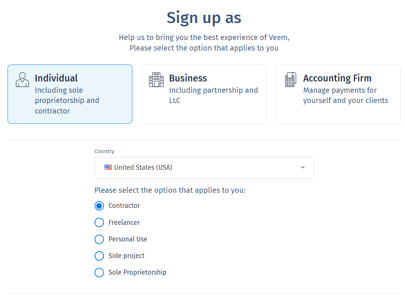
On this page, you will need to provide the following details:
- Legal Name
- Address
- Phone number
- Tax ID number
- Date of birth
Step 4: In this step, indicate whether you were invited to use Veem by another Veem user (Yes/No).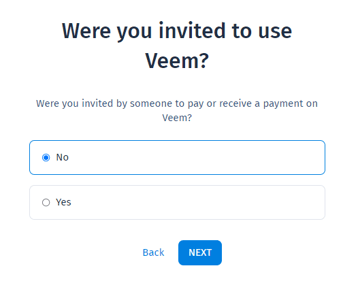
Step 5: How Do You Want to Get Started? Here, you have the option to provide your bank, debit, or credit card information for sending or receiving payments on Veem. Alternatively, you can choose to skip this step for now and proceed to the Veem dashboard.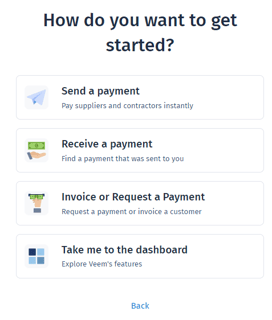
Step 6: Once you've completed these steps, your account is created. You'll receive an email asking you to verify your email. Click - Verify!
Your Veem account is now ready, and you can send and receive payments. You can share your email address used to create the account with the payer so they can send you payments. Alternatively, you can opt to send an invoice.
Need more help? You can chat or call our Customer Success team here.