Getting Started
Before adding any approvals to your account, complete the following:
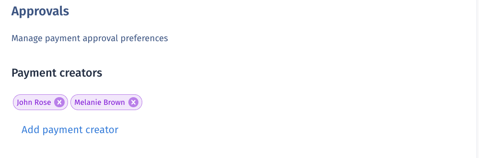
Step 1: First, add users (payment creators) to your account. If you would like help adding users, you can see our Help Centre article, How to Add a User to your Account.
Step 2: Have at least 1 tier set up with an approver under Limit-based approvals.
Tip: If limit-based approvals are set up as 'No approvals needed,' approvals are turned off as a feature on the account, and departmental approvals will not be available when sending a payment.
Click here for a Help Centre article on setting up payment approvals.
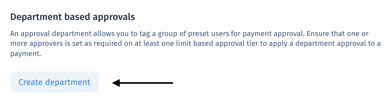
Setting up Department Approvals
You can add multiple departments and choose approvers for each department from your list of users under Payment Creators.
Step 3: At the top of the approvals screen, you'll see the users on your account who are available to approve transactions.
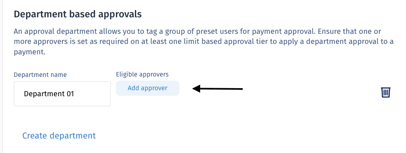
Step 4: To add Department Approvals, go to your account settings and open the Approvals tab. Under Department-based approvals, click on Create Department.
Step 5: Once you've created a department, click on Add Approver and select a payment creator user from the list.
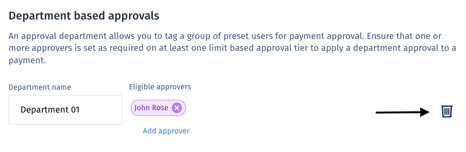
Removing approvers and departments
You can remove users as eligible approvers in departments at any time by clicking the x beside their name.
You can remove an entire department by clicking the trash can icon on the right-hand side.
Removing a user from Payment Creators will also remove them from any department or limit-based approvals.
Choosing Department Approvals in the send payment flow
When sending a payment, you will see the option to choose a department to approve the payment in the Additional Info section. You can select a department to approve the payment in the dropdown. If you choose 'None', there will be no approval required.
Things to note:
- If a user is set to an approval tier for a certain amount, they will be able to approve all payments within that tier regardless of the department.
- If a user is set to a department but is not on the tier list, they will only be able to approve payments that are assigned to their department. The tiered user can still approve these payments.
Still need help? You can chat or call our Customer Support team here.